

Refrigerator Leaking Water and Not Cooling Properly? Here’s What You Can Check Before Calling a Technician
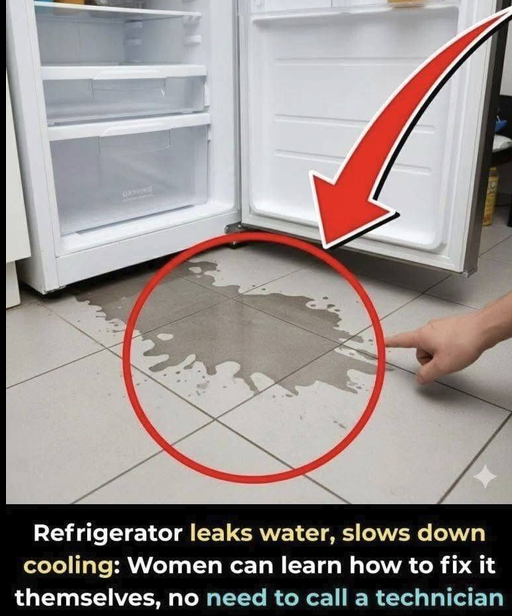
Finding a puddle of water underneath your refrigerator can be alarming. It becomes even more concerning when you notice that the refrigerator also seems to be taking longer to cool food.
The good news is that several refrigerator problems have relatively simple causes that homeowners can safely check themselves. A clogged defrost drain, damaged water line, incorrectly installed filter, blocked airflow, or dirty condenser system can all contribute to refrigerator trouble.
But there is an important warning:
Water leaking from a refrigerator does not have one universal cause, and a leak does not necessarily explain poor cooling. The two symptoms can sometimes be related, but they can also be separate problems.
Before taking anything apart, here’s how to troubleshoot the situation safely.
First: Where Is the Water Coming From?
The location of the water provides one of the best clues.
Look carefully before moving the refrigerator. Is the water appearing underneath the freezer door? Behind the refrigerator? Inside the fresh-food compartment? Beneath vegetable drawers? Around the water filter? Or directly underneath the appliance?
Whirlpool identifies drainage blockages, installation problems, water-supply issues, filter problems, and leveling as potential sources of refrigerator leaks.
Once you know where the water first appears, troubleshooting becomes much easier.
1. Check for a Clogged Defrost Drain
One common cause of water collecting inside or underneath a refrigerator is a blocked defrost drain.
Modern frost-free refrigerators periodically melt frost from the evaporator during the automatic defrost cycle.
That water needs somewhere to go.
Normally, it flows through a drain into a pan underneath the refrigerator, where it eventually evaporates.
If the drain becomes clogged with food particles, debris, or ice, water can back up instead.
Whirlpool notes that a clogged defrost drain can cause water to pool inside the refrigerator and eventually leak through the bottom door seal onto the floor.
Signs the Defrost Drain May Be Blocked
You may notice water collecting beneath the crisper drawers, a sheet of ice forming on the bottom of the freezer, recurring puddles underneath the appliance, or water appearing after the refrigerator completes a defrost cycle.
The exact drain location varies considerably between refrigerator models.
It is commonly near the lower rear portion of the freezer compartment, but check your owner’s manual rather than dismantling panels based on a generic internet video.
Can You Unclog the Drain Yourself?
Some refrigerators provide relatively easy access to the drain.
Others require panels to be removed.
If your manufacturer’s instructions provide a homeowner procedure, follow it carefully.
A small amount of ice around an accessible drain may sometimes be thawed according to the manufacturer’s recommended procedure.
However, don’t start pushing sharp metal objects into refrigerator drains.
You could puncture tubing or damage components.
Whirlpool recommends consulting model-specific instructions and notes that professional inspection may be appropriate when water is accumulating beneath or inside the refrigerator.
2. Check the Refrigerator Water Supply Line
Does your refrigerator have an ice maker or water dispenser?
If so, it may have a pressurized water line running from your home’s plumbing to the refrigerator.
That line is another important leak source.
Maytag notes that refrigerator supply lines can develop cracks, damage, kinks, leaks, or connection problems.
Look behind the refrigerator for water or moisture around the tubing and connections.
Important Safety Step
Before inspecting the line closely, unplug the refrigerator and close its water shutoff valve.
Whirlpool specifically recommends disconnecting power and shutting off the water before inspecting the supply line for damage.
If you find cracked or damaged tubing, it should be replaced with a compatible part rather than patched with an improvised repair.
3. Check the Connections Behind the Refrigerator
The tubing itself may be perfectly fine while a fitting is leaking.
Inspect accessible connections at the household shutoff valve and where the supply tubing connects to the refrigerator.
Whirlpool and Maytag both recommend checking that tubing is properly inserted into fittings and looking for leakage around accessible connections.
A refrigerator that was recently moved is particularly worth inspecting because the supply line can become kinked, pinched, or disturbed.
Don’t push the refrigerator so tightly against the wall that the water line becomes crushed.
4. Check the Water Filter
If your refrigerator has a built-in water filter, think about when the leak began.
Did it start shortly after you changed the filter?
An incorrectly seated or damaged filter can cause leakage.
Whirlpool advises checking whether a recently replaced filter has been installed correctly and inspecting it for damage if water is leaking around the filter area.
Remove and reinstall it only according to your refrigerator’s instructions.
Also make sure you’re using a filter compatible with the exact refrigerator model.
5. Check the Drain Pan
Many refrigerators have a drain or evaporation pan underneath.
Water from the defrost system normally enters this pan and evaporates.
A small amount of water there can therefore be completely normal.
A puddle spreading across the kitchen floor is different.
Depending on the refrigerator design, excessive water, a damaged pan, improper positioning, or another drainage problem may contribute to leakage.
Don’t assume the pan itself is the problem until you’ve determined where the water is coming from.
6. Make Sure the Refrigerator Is Level
A refrigerator that isn’t sitting correctly can sometimes develop drainage or door-closing problems.
Whirlpool notes that improper leveling may contribute to water leaking from the bottom when water accumulates toward the front of the drain pan.
Don’t simply guess using the kitchen floor.
Follow the leveling procedure specified in your owner’s manual because some refrigerators are intentionally installed with a slight manufacturer-specified tilt.
7. Inspect the Door Gasket
Now we get to the second symptom:
poor cooling.
The rubber gasket around the refrigerator and freezer doors is designed to create a seal.
If the door doesn’t close correctly, warm humid air can continually enter the appliance.
That can make the refrigerator work harder and contribute to excess moisture and frost.
Inspect the gasket for obvious tears, deformation, food residue, or sections that aren’t contacting the cabinet correctly.
Also check for something surprisingly common:
a food container preventing the door from fully closing.
A refrigerator door that looks closed may still have a small gap.
8. Don’t Block the Refrigerator’s Internal Air Vents
Refrigerators rely on circulating cold air.
Packing food tightly against the vents can interfere with that circulation.
GE Appliances specifically notes that large containers positioned at the back can block cold-air flow and adversely affect refrigerator temperatures.
If your refrigerator seems warmer than normal, inspect how it is loaded.
Move oversized containers away from vents and leave enough space for air to circulate.
This simple change may improve temperature distribution without requiring any repair.
9. Check the Condenser Area — But Read the Manual First
Older refrigerators often have condenser coils underneath or behind the appliance that can accumulate dust and pet hair.
Dirty condenser coils can make the sealed refrigeration system operate less efficiently.
GE Appliances recommends unplugging the refrigerator before condenser maintenance and notes that dirty condenser coils can reduce system efficiency.
But don’t automatically start dismantling the refrigerator.
Many newer refrigerators have condensers positioned in ways that do not require routine homeowner cleaning. GE notes that most of its refrigerators manufactured since 2001 have coils in locations that don’t require cleaning, though some models still do.
Your owner’s manual should tell you whether coil cleaning is required and how to do it.
10. Listen to the Refrigerator
A refrigerator isn’t silent.
Normally, you may hear fans, compressor operation, water entering the ice maker, clicking during normal cycles, or other routine sounds.
But changes can provide clues.
If the refrigerator is warm and you never hear normal cooling operation, something may be wrong.
If you hear repeated clicking while cooling fails, or a fan is making unusually loud grinding noises, professional diagnosis may be required.
Don’t remove electrical covers or test energized components unless you’re qualified to do so.
Does a Water Leak Automatically Cause Poor Cooling?
No.
This is an important correction to viral posts that combine the two symptoms.
A refrigerator can leak because of a water-supply connection while the cooling system works perfectly.
Similarly, a refrigerator can stop cooling because of an airflow, fan, compressor, control, refrigerant, or electrical problem without leaking a drop of water.
Sometimes the symptoms overlap—for example, frost or drainage problems may occur alongside temperature problems—but you shouldn’t assume one automatically caused the other.
Check the Temperature
Don’t rely entirely on how the refrigerator “feels.”
Measure it.
Food-safety guidance recommends keeping refrigerators at 40°F (4°C) or below.
A refrigerator thermometer can help you determine whether the appliance is actually maintaining a safe temperature.
If food is warming into unsafe temperatures, troubleshooting the leak is no longer the only priority.
You also need to protect the food.
What to Do If the Refrigerator Stops Cooling
Keep the doors closed as much as possible.
Every time you open the door, cold air escapes and warm air enters.
If the refrigerator has lost power or isn’t maintaining temperature, monitor food carefully.
Perishable foods that have remained above safe refrigeration temperatures for too long may need to be discarded.
Don’t taste questionable food to determine whether it’s safe.
Can You Fix a Leaking Refrigerator Yourself?
Sometimes.
Homeowners can reasonably perform basic checks such as confirming the doors close correctly, checking for blocked interior vents, inspecting accessible water tubing for obvious leaks, verifying filter installation, checking whether the refrigerator is properly positioned, and performing manufacturer-approved cleaning or drain maintenance.
But there is a boundary between troubleshooting and appliance repair.
You don’t need to turn a simple puddle into an electrical or refrigerant hazard.
When You Should Stop and Call a Technician
Professional service is the better choice when the leak continues after basic checks, water appears to be coming from inaccessible internal components, the compressor or fans aren’t operating correctly, electrical components are wet, the appliance trips a breaker, you smell burning, there’s damaged wiring, or the refrigerator continues to run but cannot maintain a safe temperature.
Sealed-system problems involving the compressor or refrigerant should also be handled by qualified technicians.
A homeowner shouldn’t open a refrigerant circuit.
Water and Electricity: Don’t Ignore the Risk
A refrigerator combines plumbing, electricity, and a large metal appliance.
If water is reaching the electrical cord, wall outlet, wiring, or electrical components, don’t continue experimenting while the refrigerator remains energized.
Disconnect power only if you can do so safely without stepping into water or touching wet electrical equipment.
If the electrical area is wet or you’re unsure whether it is safe to approach, shut power off from a safe location and get qualified assistance.
Don’t Use Random Internet “Hacks”
Some online tutorials suggest pouring boiling water into refrigerator components, using metal wire to aggressively clear drains, dismantling freezer panels without instructions, or applying chemicals inside drainage systems.
Those approaches can damage the refrigerator.
Boiling water can deform some plastics.
Sharp objects can puncture components.
Removing panels may expose fans, wiring, heaters, or delicate refrigeration parts.
Use your refrigerator’s model-specific service information whenever possible.
A Quick Troubleshooting Order
If you discover water underneath your refrigerator, the most efficient approach is:
- Protect the floor and identify where the water begins.
- Check inside the refrigerator and freezer for standing water or ice.
- Inspect the defrost-drain area if it is safely accessible according to the manual.
- If the appliance has a water connection, inspect the supply line and fittings after safely disconnecting power and shutting off the water.
- Check the water filter for correct installation.
- Make sure doors close completely and gaskets are clean and intact.
- Check that food isn’t blocking internal air vents.
- Verify the actual refrigerator temperature.
- Consult the owner’s manual for condenser and leveling instructions.
- If the source remains unclear or cooling remains inadequate, arrange professional service.
Frequently Asked Questions
Why is water coming from underneath my refrigerator?
Possible causes include a clogged defrost drain, leaking water-supply line, loose connection, water-filter problem, drainage issue, or improper installation or leveling.
Can a clogged defrost drain cause water on the floor?
Yes. Whirlpool notes that a blocked defrost drain can allow water to accumulate and eventually leak through the bottom door seal.
Why is there water underneath my vegetable drawers?
A drainage problem is one possibility, particularly if defrost water isn’t draining properly. The exact design varies by refrigerator, so consult the model’s manual before accessing internal drain components.
Why did my refrigerator start leaking after changing the filter?
The filter may not be fully seated or could be damaged. Whirlpool recommends checking installation and inspecting the filter when leakage appears around that area.
Can a refrigerator water line leak?
Absolutely. Cracked or damaged tubing and leaking connections are common areas to inspect on refrigerators connected to household water.
Will cleaning condenser coils make my refrigerator colder?
Dirty condenser coils can reduce efficiency on models where the coils require cleaning. But many modern refrigerators don’t require routine condenser cleaning, so check the owner’s manual first.
Why is my refrigerator running but not getting cold enough?
Blocked airflow, door-sealing problems, inappropriate temperature settings, condenser issues on applicable models, fan problems, or more serious refrigeration-system faults are among the possibilities. GE specifically recommends checking that large containers aren’t blocking cold-air circulation.
Should I unplug a leaking refrigerator?
If you need to inspect the water supply or perform manufacturer-approved maintenance, disconnecting power is an important safety precaution. Whirlpool recommends unplugging the refrigerator and shutting off the water before inspecting the supply line.
If water has reached electrical equipment, prioritize electrical safety and don’t touch wet energized components.
Final Thoughts
A puddle underneath your refrigerator doesn’t automatically mean you need a new appliance—or even an expensive repair.
Sometimes the cause is surprisingly simple:
a clogged defrost drain, loose water connection, damaged supply tube, incorrectly installed filter, blocked airflow, or installation issue.
Several of those problems can be identified with basic homeowner checks.
But don’t assume every refrigerator leak can or should be repaired without professional help.
If the refrigerator continues leaking, isn’t maintaining a safe temperature, has electrical components exposed to water, repeatedly trips a breaker, or requires access to internal electrical or sealed refrigeration components, stop troubleshooting and arrange qualified service.
And one final point: appliance repair isn’t about whether someone is a man or a woman. Anyone can safely learn basic refrigerator troubleshooting. What matters is knowing which checks are appropriate for a homeowner—and when the repair requires a trained technician.